FURTHER READING
Further Reading for Gemini
Tutorials, documentation and walkthroughs for designing with Gemini, as listed in the published guide.

 Gemini
  OpenDesign
 How to design interfaces with Gemini CLI in OpenDesign: a whiteboard photo as the reference, GEMINI.md as the rulebook, one operations-dashboard task from brief to reviewed file, and the limits to know before you start.

“From a whiteboard photo
to a dashboard we can read.”
THREE WAYS INTO THIS GEMINI GUIDE
This guide: brief, references, design rules and a reviewed HTML result.
Read this guide SETUPHere is the full path from a clean machine to a Gemini CLI that can build and verify UI.
Go to setup COMPARISONHow Gemini differs from Codex, Claude Code, Cursor for design work, and when to choose another workflow.
See the comparisonOne Complete Gemini Design Task
A single task, shown end to end: the brief and constraints you hand over, the artifact that comes back, and the checks you still run before it is done. The interface below is an illustrative example built for this page, not a recorded Gemini run.
BriefDesign an operations dashboard from the attached whiteboard photo: four headline numbers, a weekly volume chart and a queue of incidents. One screen on desktop, a scrollable summary on a phone.
data-od-id hooksWrite the brief, select the design system and define the acceptance criteria.
Plans the layout, writes the HTML, CSS and JavaScript and revises it on request.
Provides the design system and skill, renders the preview and stores every version as a file in the project.
Visual hierarchy, spacing on the 8px grid, both breakpoints and every interaction are checked before handoff.
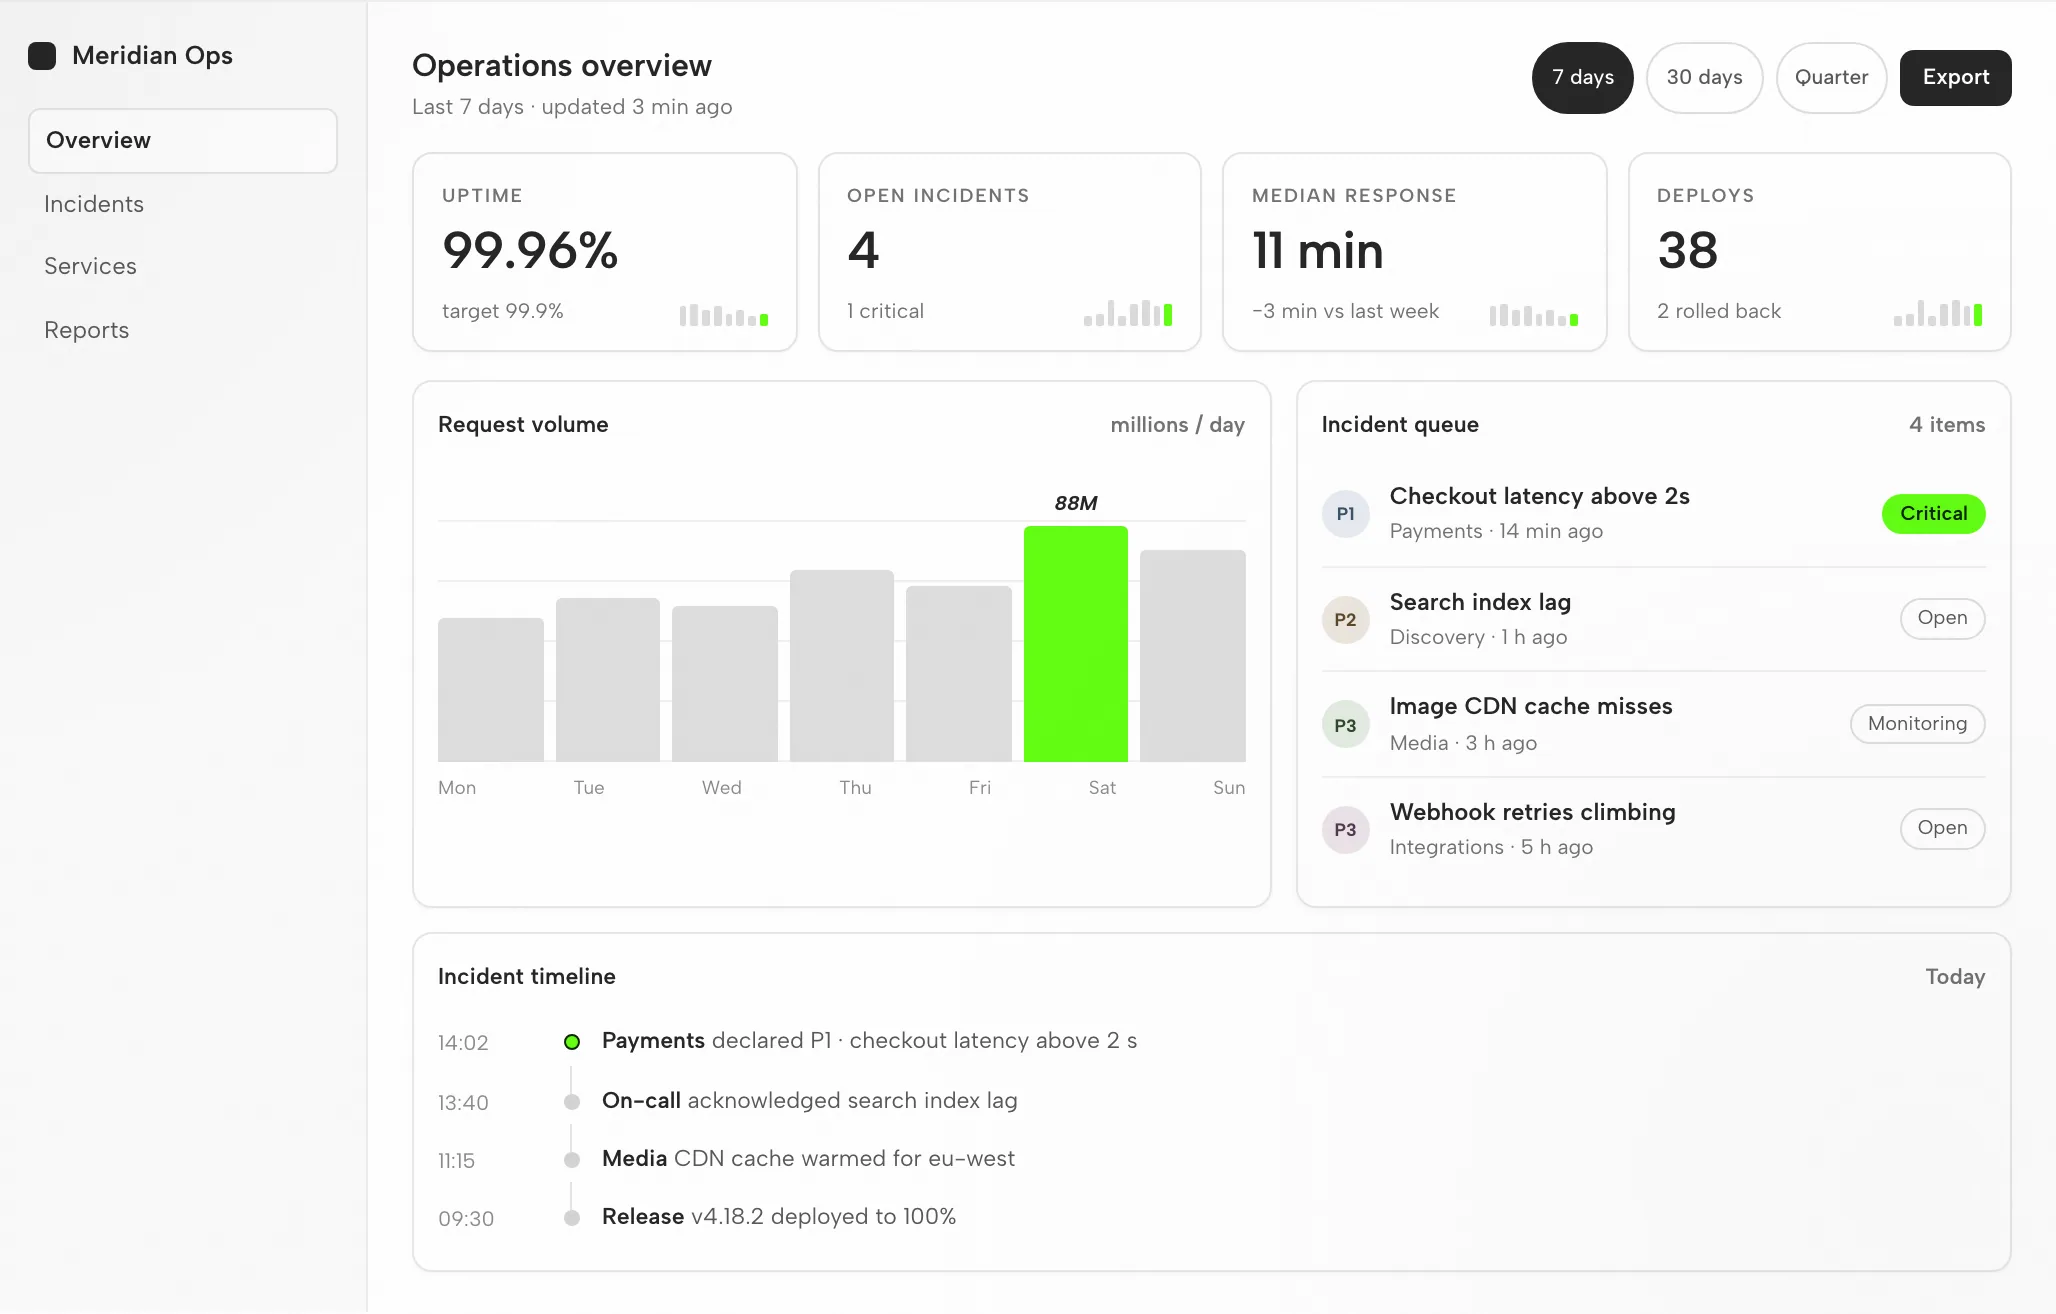
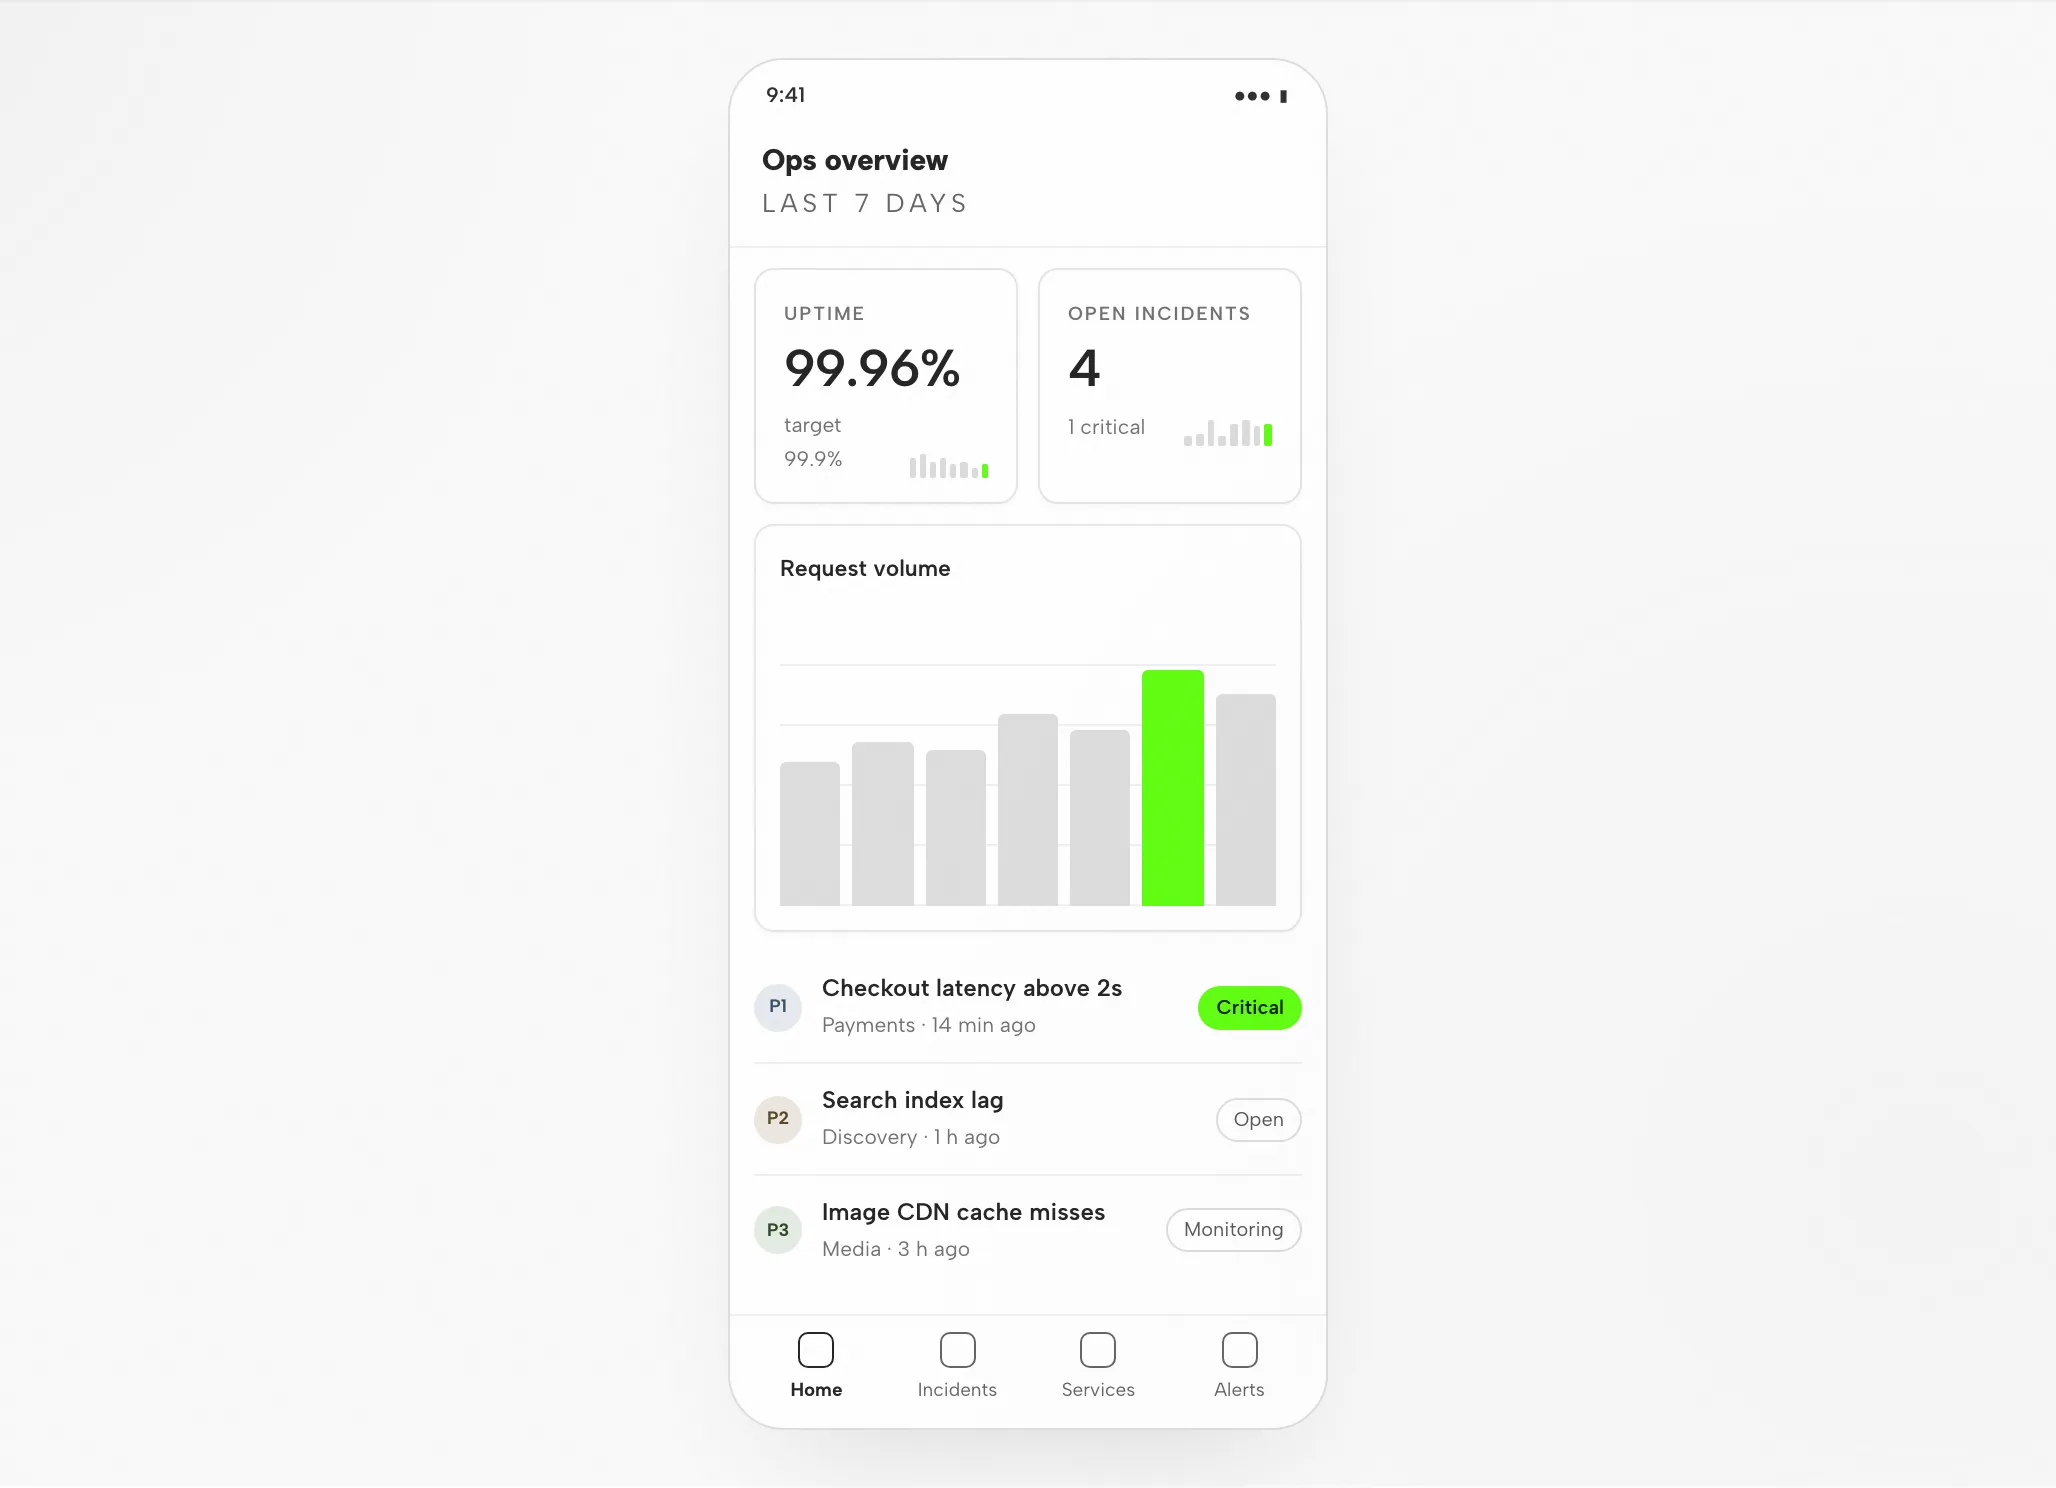
Four cards, chart and queue share one 8px grid; nothing overlaps at 1440 or 390.
Headline numbers read first, then the chart, then the queue; the accent marks one bar and one critical pill.
Two numbers per row, chart below, queue as a list; the date range folds into a sheet.
Switch the range, filter to critical, arrow through the queue.
Fit
Compatibility
This guide covers Gemini as connected through the OpenDesign desktop app. Published references checked on 6 September 2026.
Gemini CLI is Google’s open-source (Apache-2.0) terminal AI agent. It reads your codebase, edits files, runs commands, fetches the web, and grounds answers with Google Search. This page is about designing interfaces with Gemini through OpenDesign, not about Gemini’s own interface. OpenDesign’s setup notes list the available agents.
Google account (free tier) or Gemini API key (BYOK). Authenticate with your Google account or Gemini API key (BYOK) — credentials stay on your machine. This page does not promise a quota or price.
Check the download page for desktop builds. The Node.js and pnpm requirements in the source quickstart apply to running from source, not to installing a desktop package. Minimum compatible Gemini version: not verified here.
Follow the connection instructions shown by your installed version, then run a small task. Confirm that Gemini handled it and that the artifact opens. A download alone does not establish a working connection.
Start with the desktop app
Download first, complete the Gemini setup for your installed version, then check a small result. You do not need to build OpenDesign from source to follow this path.
Choose the package for your computer, install it and open the app.
Download OpenDesignFollow the Gemini instructions in your installed version. Authenticate with your Google account or Gemini API key (BYOK) — credentials stay on your machine.
Gemini CLI documentation# 1. Install Gemini CLI (Node 20+)
npm install -g @google/gemini-cli
# or run without installing: npx https://github.com/google-gemini/gemini-cli
# 2. Start it in your project and authenticate on first run
cd your-project
gemini # sign in with your Google account, or set GEMINI_API_KEYFrom the Gemini setup notes in the published guide; check the vendor documentation for the current command.
Use a small brief so you can judge the whole loop, including one revision.
Build a settings screen with a profile form and a save confirmation. Use my design rules. Check it at desktop and mobile widths.
To run OpenDesign from source, follow the technical quickstart instead.
The Gemini design workflow
The same operations dashboard task, followed from brief to verified file. Each step lists what you provide, what Gemini does, what OpenDesign contributes and what you check.
Plain language, three to six lines. Name the audience, the job of the screen and the platforms.
A design system and a few hard rules. This is what separates on-brand output from a generic look.
Gemini writes a self-contained HTML file: layout, styles, interactions and stable hooks.
The file renders inside OpenDesign at the widths you asked for. This is where the design is judged.
data-od-id targets for comments and edits.Request changes by pointing at elements in the preview. Every revision is a new file; nothing is overwritten silently.
Resources
Tutorials, documentation and walkthroughs for designing with Gemini, as listed in the published guide.
The artifact types Gemini can produce in OpenDesign, one skill per type.
Brand tokens and components to bind before Gemini generates anything.
Starting points for decks, landing pages and product screens.
Limitations
FAQ
Start with a small task, judge the round trip, then bring the real brief. Choose the option that matches your setup; the page does not detect it.